We put an absolute ton of time, years of process adjustments, and over 50 thousand dollars' worth of cleaning and polishing equipment behind every part that we sell. Please understand that much of this information is proprietary, so while we cover this from a broad perspective, we can't disclose the details of every process.
Suffice to say that while our competition will pop it off of an engine and ship it to you (good or bad), we spend countless hours providing you parts that are in as close to original condition as possible. This provides you with some very aesthetically pleasing parts, of course, but the real reason behind these processes is that every surface can be properly inspected for any flaw that might leave you stranded in the water. As a result, we sell more used parts to marine repair shops than anyone in our market. The professional just doesn't have time to screw around with sending back a bad crankshaft twice before they get a good one.
Pistons and Cylinder Head Covers
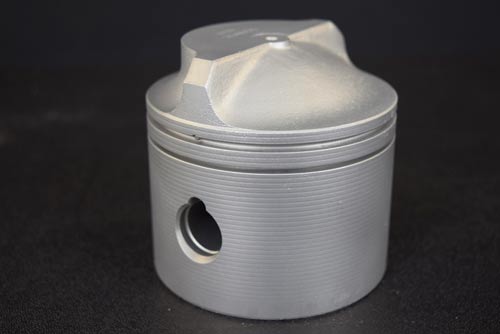
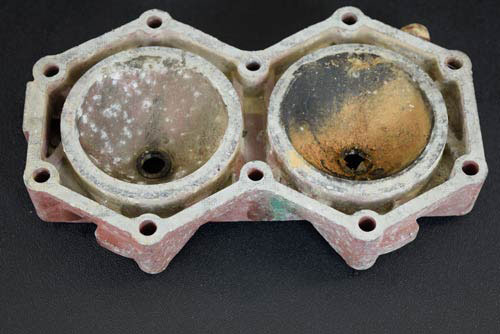
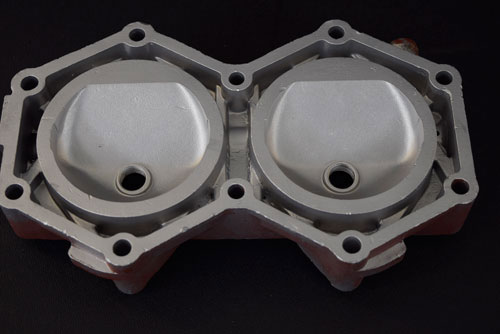
These parts are softly glass-beaded free of carbon. This process removes carbon without having any effect on the original metal underneath. After dry blasting, the part can be properly inspected. We inspect at that time and then finish these parts in a wet blast cabinet. The part is left with a satin matte finish that is very similar to how they come from the factory. For more information about glass beading and wet blasting, please scroll to the bottom of this page.

Crankshafts
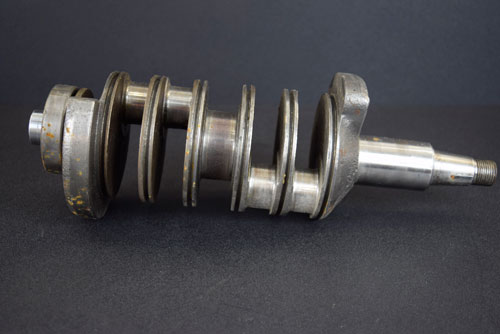
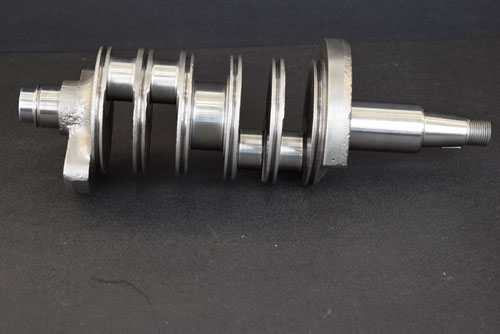
Each crankshaft is polished on a lathe. We give them a quick polish, just so we can mic them out and make sure that we're not putting time into a bad part. Good crankshafts are completed on the lathe for bearing and journal surfaces. They are mic'd out again at the end of this process. We complete the process by glass beading the counterweights and the splines at the bottom of the crankshaft.
Every crankshaft that leaves here is in gorgeous condition and it is common to have anywhere between 1 and 2 hours in a single crankshaft just for the purpose of getting it to that point. When the crankshaft journals and bearing surfaces are measured at the end, they are considered acceptable if they have wear of less than .0005. In layman's terms, that is half a thousandth. Crankshaft shops generally work with any variation on the journals and bearing surfaces up to 1/1000th, so we have reduced that number by half. No one in our market comes even close to putting in the work we do on a single crankshaft. For more information on the glass beading process, scroll to the bottom of the page.
Driveshafts and Propeller Shafts
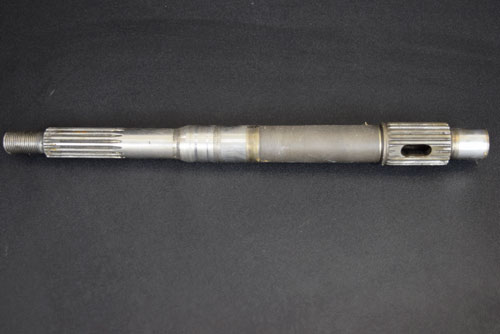
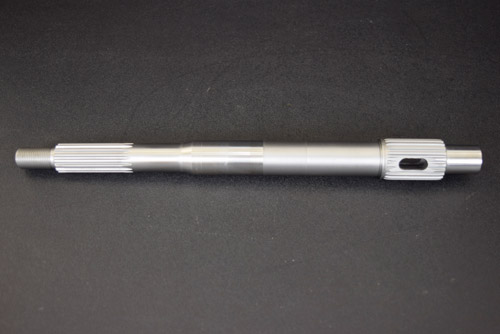
Having done this for some time, I can tell you for sure that about 1 out of every 4 driveshafts and propshafts are scrap once you can put a proper inspection on the part. We started polishing these on the lathe, some years ago. It wasn't just that the parts were clean and shiny again but that you could actually inspect the bearing surfaces as well as check for straightness at the same time.
We took that a step further by glass-beading the splines out after the bearing surfaces were polished and measured so that every shaft leaving the shop looks essentially like brand new and will work accordingly. We wrap up the work with a steel corrosion inhibitor and pack the part so that you only receive top notch parts when you order. For more information on the glass beading process, scroll to the bottom of the page.
Adaptor Plates
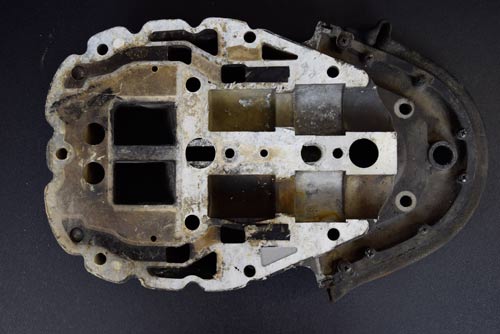
Carbon deposits rob your engine of power. When replacing an adaptor plate, installing a used one is chancy enough because if there's that much buildup on it, you are certain to face power loss and future problems. After a great deal of time spent refining the process, we have nailed this down to a science.
Every bit of carbon, grease, and grime has been removed from this plate and the process has been finished with a vapor blaster. Vapor blasting provides a glass-smooth finish that is not only exceptionally clean, but will resist future carbon buildup as well or better than the original manufacturer specs. When you buy an adaptor from us, you're guaranteed a part that has no sign of saltwater use, and that you or your mechanic will proudly install and be able to count on.

Gears
Gears are usually glass-beaded solely for the purpose of inspection. This will leave a clean, shiny finish on the gear face that really shows any flaw in the part. The bearing surface is inspected to make sure there is no mark larger than about half a thousandth, which is easily smooth enough for a bearing to roll over with no catch.
Clutch plates and teeth are carefully inspected for wear. Anything that is beyond an estimated half-life is discarded. Glass beading is excellent for cleaning a gear without removing any metal from the part. For more information on that process, please scroll to the bottom of this page.


Complete Lower Units
Every single complete lower unit that leaves this shop is disassembled, inspected, then pressure-checked to 12 psi, which is twice the pressure generally recommended by the manufacturer. Units that do not hold 12 psi for a minimum of 30 minutes are disassembled again and the seals are replaced. We almost always replace impellers, as well, but if an impeller is pulled and is in like-new condition, we'll usually leave it be.
During the above process, we inspect the propeller shaft for straightness and bearing surfaces, gears, clutch dog and clutch plates, and the seals. Generally, we'll polish the propeller shaft out for inspection and glass-bead the splines during this inspection.
Likewise, we'll usually go ahead and take all of the carbon off of the bearing carrier. Carbon buildup costs you power, even at the lower end, so we remove any heavy carbon buildup when and where we find it.
Connecting Rods
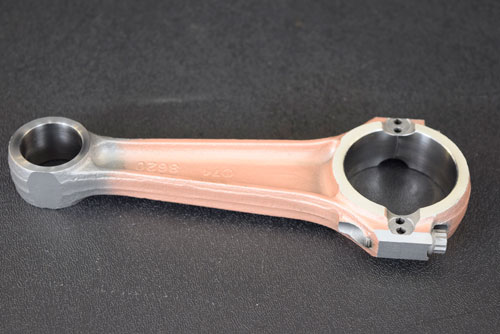
Each connecting rod is glass-beaded free of grease and grime. Following that, we put each one in a vise and micropolish the bearing surfaces. We reassemble the rod to ensure that the surfaces of the 2 halves mate up perfectly.
Want numbers? 1 out of every 4 are not suitable for reuse. When you get a product with a highly polished surface, you'd be shocked how many rods are actually bad. We’ll spend about 5-10 minutes more per rod than our competition but we’ll be one of the few places that almost never send out a bad rod because we think your continued business and referrals are worth the effort.
Carburetors
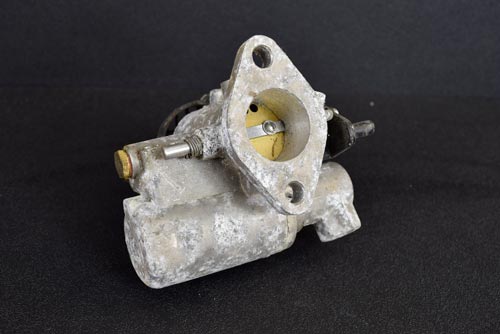
We disassemble all of our carburetors, at least far enough to clean out the bowl. If we take the bowl off and find the carburetor to be exceptionally clean inside, we'll wash it, ultrasonically clean it, and put it up for sale.
Over the years, we've received about a thousand loose carburetors that we handle somewhat differently because they're generally filthy. With these, they are 100% disassembled, glass beaded for cleanliness, and wet blasted. The surfaces, both inside and out, come out like new. These carburetors will most certainly require a rebuild kit to be installed before use but they should arrive ready for that rebuild.
If you or your customer would like a carburetor rebuilt or would like to have this service performed on your existing carburetors, please contact us. For more information on glass beading or the wet blast process, please scroll to the bottom of this page.

Tilt Tubes, Thrust rods, and various other pin type parts
All of these parts are glass-blasted, then polished on the lathe. We glass-bead out the inside of tilt tubes to ensure that the part you receive is not corroded or pitted inside. The splines on tilt tubes are glass-beaded. Once they are properly cleaned, we can ensure that the splines are in good condition and not thinned down.
Steering Swivel Arms
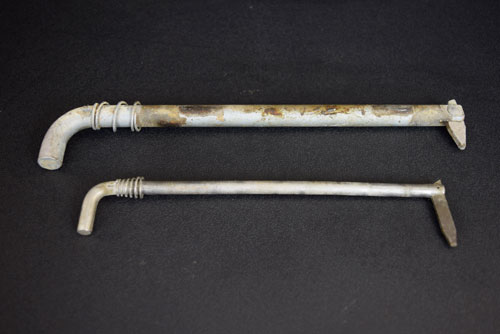
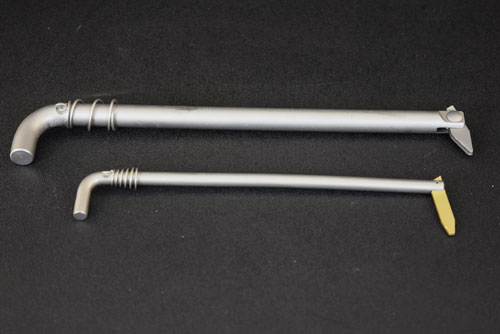
We take these parts and glass-bead the entire shaft, as well as the splines. Spline corrosion is one of the biggest issues with these parts and selling them to you dirty would not allow us to properly inspect the part. We'll usually take the rest of the shaft and put it on the lathe so we can get a clean, bright finish, although in some cases the configuration is such that we’ll glass-bead finish the product.
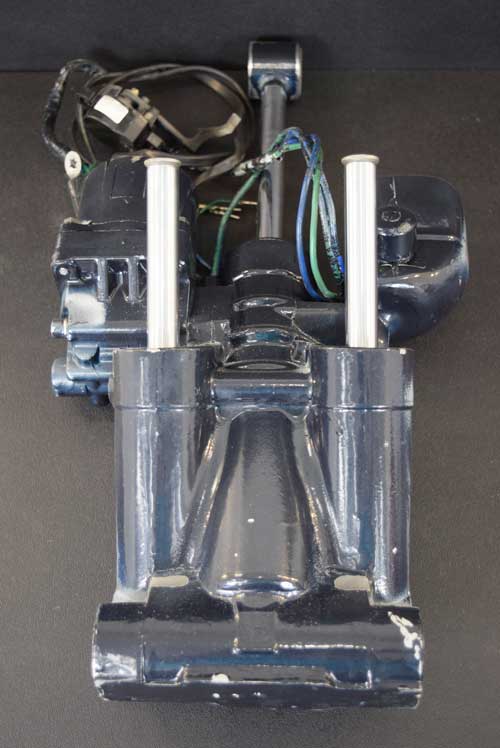
Power Trim Systems
Our goal is to test every power trim system while it's still on the engine. It's important to have that weight bearing down on the system in order to ensure that it will work up and down smoothly and that it will actually hold in place. We like to pre-set our power trims in the up position while the engine is on the stand each night before we go home so that we can check to ensure that it’s still in the same position the following morning.
Power trims can be funny beasts. We've had them work perfectly in the shop overnight and then they get installed on a customers engine and leak. Unfortunately, situations like this do come up sometimes, making it all the more important that you trust the company you're working with to actually answer the phone when a situation like this arises.

Flywheels
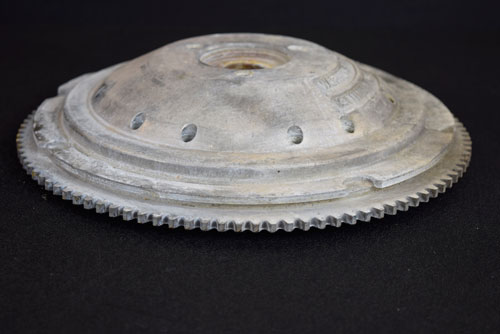
Older flywheels, specifically from OMC, were sold without paint. Over the years, these get ugly. Our answer to that was a triple cleaning process. Each flywheel is fully glass-blasted with crushed glass. We come back with glass bead to give it a sheen. We wrap the process up with a wet blast to give it a deep, satin matte finish that will last for many years. This provides you with a flywheel that will look like new for many years to come.
Whether the flywheel is painted or not painted, we glass-bead out the bore and teeth to check for corrosion and wear. The aluminum surfaces are finished with an aluminum corrosion inhibitor and the teeth and bore are finished with a steel inhibitor. For those of you working with an older OMC engine, you’re going to be tickled out of your mind if you take a lot of pride in your engine because no one anywhere produces older flywheels in the condition that we do.
For more information on the various processes discussed here, please scroll to the bottom of this page for additional information.

4 stroke heads, including I/O
I got so fed up watching people say that these were good when they really hadn't done anything but pull them off the engine, so we decided to do something different. The first thing we do is to make sure that the head is straight. Every head that is deemed to be within specs is then disassembled. We actually go through the process of testing each of the valves to make sure they are sealed to the manufacturers recommendations. When they don’t seal, which is the case about half of the time, we regrind them, reseat, and reassemble the head.
Prior to reassembly, we clean out all of the carbon and specifically with aluminum heads, we refinish them in a wet blasting machine so they are smooth, resistant to future buildup, and ready for many more years of use. For more information on the wet blasting process, please scroll to the bottom of this page.
Our Processes
Our processes are continually evolving and have been since the day we opened our doors. We've never been content to rest on what's in place. When I couldn't afford to do it any differently, we washed parts in a tub of WD-40, years ago. Even then, I knew that if you didn’t do something to clean it up, there was no way you could inspect it.
With each passing year, though, we've continued to improve, add equipment and dedicate an increasing amount of time to perfecting what we do. We're better than anyone in our market, I think, but even that won't be good enough long-term. Clean, inspected parts that both you and I can be proud of is a passion of mine and the folks who work here have really stepped up to champion that cause. We still make mistakes.
We're continuing to go through tens of thousands of old inventory items and get them to this standard. We're continuing to improve each step of the process. Our goal is the perfect part at a price that both you and I can be pleased with and an inspection process good enough to eliminate returns.
I promise you this one thing: When you get a part from us, even if it's one of our older parts that didn't get processed like the explanations above, you're going to be tickled because even those older parts are reprocessed before they ship. No one in our shop will accept anything less than the best job we are capable of doing with each and every part we sell.
About the processes
Soda blasting is done in a standard dry blast cabinet using compressed air and soda bicarbonate for media. Soda is a soft media. It's much like the baking soda in your kitchen. Soda impacts a part and explodes. The explosion, as you'd expect, explodes in a 360 degree radius around the point of impact. This is an extremely clean method for cleaning carbon off of parts.
The disadvantage to soda is that it is caustic so steel parts will retain enough soda to rust later on. Because of this, any part we soda blast is followed with a thorough run through the wet blast system to ensure that all excess soda particles are completely removed.
Crushed Glass
Crushed glass is used for primary removal of oxidation, discoloration, grease, gasket, rust, etc… Crushed glass is pretty similar to silica sand blasting, which most people know something about. It's made from bottle glass and the microscopic pieces are angular and sharp, facilitating fast removal of contaminants.
Like sand, crushed glass leaves a rough surface that is suitable for paint once the part has been washed. As a rule, we never leave a crushed glass finish on a part but we will refinish any part you wish to paint with it so that you have a surface that paint will better adhere to.
Glass Beading
Glass beading is the last of the dry processes that we use here. Glass beads are microscopically round so they have more of a peening effect than crushed glass. This will leave the part looking shiny and clean. One downside to glass bead is that it usually leaves some media embedded in the part. In some cases, this is a suitable finish.
In our continual search for perfect parts, I don't generally leave a part with a glass beaded surface because we have the means to make it smoother. The other downside is that glass beading carburetors leaves bead in the threads and screws don't like to thread in that way. We learned this lesson the hard way, which is why the majority of our processes now end in wet blasting.
Wet Blasting
Wet blasting provides the ultimate finish, particularly on aluminum pieces. In the metal restoration industry, there are a number of names for this process. Water blasting, vapor blasting, wet honing. These are all the same processes with different names.
A few of our competitors have tried to copy what we do with the dry blasting process and it just isn't possible. Any dry blasting operation leaves a part with a peened, shiny look. It looks ok but the shine is from embedded media left in the part. Particularly with threaded holes, you always end up with media inside that will destroy the part if you try to thread a bolt back in over the top.
With wet blasting, water cushions the media and rather than peening the part, we’re more or less washing over it. The same water that makes for a softer finish also washes the abrasives away afterward so this is the only method we’ve found that’s safe on pistons, carburetors, etc…A lot of time and money has gone into refining this process but our wet blasting operation has provided us with the ability to literally produce parts that look like brand new.
In addition to the processes above, we also use a 25 gallon ultrasonic cleaner, centrifugal barrel polisher, vibratory polisher, and of course the lathe. Centrifugal and vibratory polishing are generally used only when processing many small parts at one time. These are both great processes for what they do and will leave clean parts with a gloss shine, particularly on aluminum.
Corrosion Inhibitor
Corrosion Inhibitor comes in a few different blends, depending on the base metal, length of time you need it inhibited for, etc…we have used everything from WD40 to VCI bagging. Primarily, pure steel parts are dipped in a steel corrosion inhibitor. This is a water-based inhibitor that will leave an invisible film on the part. This film is water and fuel soluble so it does not need to be removed prior to use. It will last for many years under indoor storage conditions. If you feel the need to remove it, a mild alkaline solution such as simple green takes it right off or if you contact us, we can remove it beforehand. You'll find this steel inhibitor on our crankshafts, rods, rings, gears, tilt tubes, and some flywheels.
The second corrosion inhibitor we will use is for straight aluminum and/or brass. This is also a water-based inhibitor that will dry spot-free. You’ll never even know it was there on aluminum, but your parts will resist chalking, fingerprints, etc… This inhibitor is for carburetors, aluminum flywheels, adapter plates, and a lot of other parts consisting primarily of aluminum.
Although it is not our main business, we offer all of the processes above to anyone interested in having their own parts restored. If you have a part that you need restored/rebuilt, we can help with that and it is surprisingly inexpensive. If you are an outboard restoration or repair business, we can work with you on solutions to really perfect your restorations while still leaving you room for your profit margins. We have also acquired parts from other vendors, cleaned them here, and then forwarded them on to the end user in many cases. Whatever you need, tell us how we can best help and we will do anything in our power to accommodate your parts needs.
